Creative Dessert Ideas with Puff Pastry
You’ve likely encountered puff pastry in various sweet and savory dishes, but discovering that perfect puff pastry filling recipe can truly elevate your dessert game. This versatile ingredient transforms into a variety of delicious treats, from classic fruit tarts to intricate pastries that impress guests every time.
One of the key benefits of using puff pastry for desserts is its incredible texture. The right puff pastry filling recipe creates layers of delicate, buttery goodness that perfectly complements sweet fillings of all kinds. Whether you’re looking for a simple last-minute treat or an elaborate showstopper for special occasions, puff pastry has you covered.
Table of Contents
Key Takeaways
- Discover the versatility of puff pastry in dessert making
- Learn how to create a variety of sweet treats with puff pastry
- Understand the benefits of using puff pastry for desserts
- Explore different ideas for puff pastry desserts
- Get inspiration for your next puff pastry filling recipe
The Versatility of Puff Pastry in Dessert Making
Puff pastry stands out as a fundamental component in many sweet treats, offering a delicate, layered texture and a canvas for creativity. I remember the first time I used it in baking—I was amazed at how something so simple could create such impressive results! Let’s explore why it works so well in desserts.
What Makes Puff Pastry Perfect for Desserts
Puff pastry is renowned for its airy layers and crisp exterior that adds sophistication to any dessert. The process of making puff pastry involves layering dough with butter, which, when baked, creates a pastry that is both crispy and tender. I’ve found that this unique structure makes it an ideal base for countless puff pastry filling recipes.
The adaptability of puff pastry in desserts is truly remarkable. From delicate fruit tarts to rich, chocolate-filled treats, the possibilities seem endless. When you master a few basic puff pastry filling recipes, you’ll have a repertoire of desserts that can be adapted for any season or occasion.
Store-bought vs. Homemade Puff Pastry
When creating puff pastry desserts, you have two main options: store-bought or homemade. Each has its advantages:
- Store-bought puff pastry saves precious time, allowing you to focus on creating delicious fillings and assembling your dessert. It’s my go-to choice for weeknight treats or when entertaining guests on short notice.
- Homemade puff pastry offers control over ingredients and can result in an even more luxurious texture. Though time-consuming, I find the process surprisingly meditative, and the results often worth the extra effort for special occasions.
Your choice between store-bought and homemade ultimately depends on your available time, experience level, and the specific needs of your puff pastry uses recipes. There’s no wrong answer here—both can yield incredible results!
Essential Tools and Ingredients for Puff Pastry Desserts
With the right ingredients and equipment, you’ll be well on your way to crafting impressive puff pastry desserts with ease. Let’s stock your kitchen with everything needed to bring your puff pastry ideas to life.
Basic Pantry Ingredients
Having these staples on hand means you’re always ready to whip up delicious puff pastry filling recipes whenever the craving strikes:
- Granulated sugar
- All-purpose flour
- Cinnamon and other warming spices
- Fresh or dried fruits
- Nuts (almonds, walnuts, hazelnuts)
- Chocolate chips or bars
- Vanilla extract
- Honey or maple syrup
In my experience, keeping these basics stocked means I’m never more than 30 minutes away from enjoying a fantastic puff pastry dessert!
Equipment You’ll Need
Having the right tools makes creating puff pastry recipes sweet and simple. Here’s what I consider essential:
| Equipment | Use |
|---|---|
| Rolling Pin | Rolling out puff pastry to the right thickness |
| Baking Sheet | Baking puff pastry desserts to perfection |
| Sharp Knife or Pastry Cutter | Cutting puff pastry into desired shapes |
| Parchment Paper | Preventing sticking and easing cleanup |
| Pastry Brush | Applying egg wash or glazes |

Preparing Your Workspace
Before diving into puff pastry dessert creation, take a moment to organize your space. Clear a large, flat surface for rolling out the pastry and arrange all your ingredients and equipment within easy reach.
Tip from my kitchen: I like to chill my work surface by placing ice packs on it for a few minutes before rolling out puff pastry. This little trick helps keep the butter layers intact, resulting in a flakier final product!
Now that we’re prepared, let’s explore some delicious puff pastry filling recipes that will impress everyone at your table.
Classic Puff Pastry Filling Recipes Everyone Should Know
These timeless puff pastry desserts have stood the test of time for good reason. They’re reliable crowd-pleasers that showcase the beautiful texture of puff pastry while being surprisingly simple to prepare.
Apple Turnovers with Cinnamon Sugar
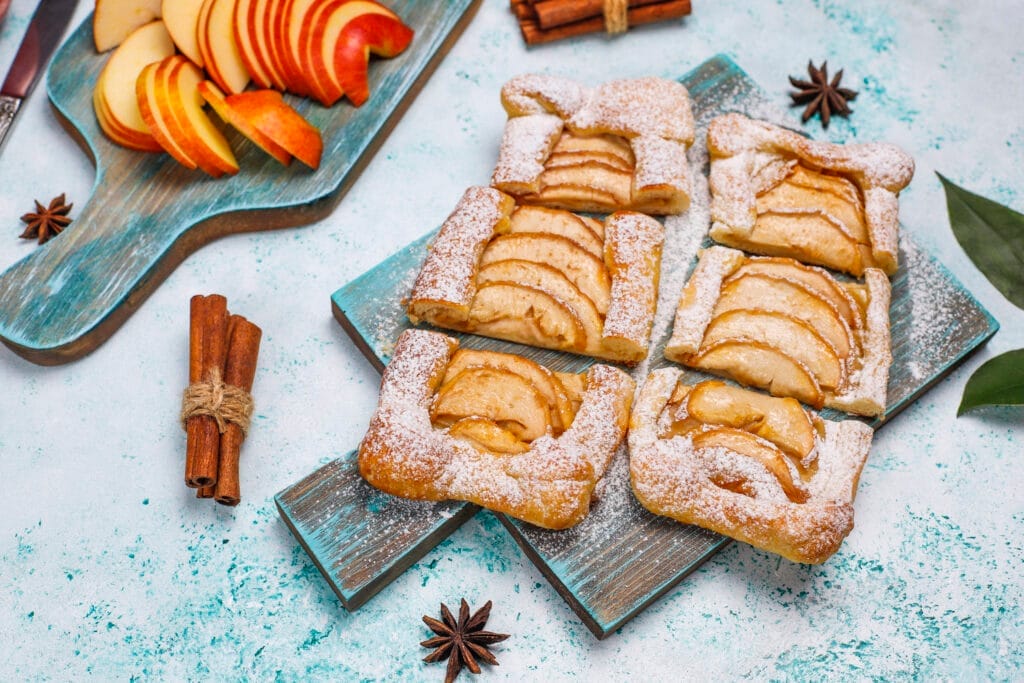
Apple turnovers combine flaky puff pastry with the warm embrace of spiced apples—a pairing that reminds me of autumn afternoons at my grandmother’s house. The contrast between the crisp pastry and tender filling makes these irresistible.
Ingredients:
- 1 sheet of puff pastry, thawed
- 2-3 apples, peeled and sliced
- 1/2 cup granulated sugar
- 2 tbsp cinnamon sugar
- 1 egg, beaten (for egg wash)
Time Required:
- Preparation time: 20 minutes
- Baking time: 25 minutes
- Total time: 45 minutes
Step-by-Step Instructions:
- Preheat your oven to 400°F (200°C). Line a baking sheet with parchment paper.
- Roll out the puff pastry on a floured surface to a thickness of about 1/8 inch.
- Place the apple slices on one side of the pastry, leaving a 1/2-inch border along the edges.
- Dust the apples with granulated sugar and cinnamon sugar.
- Fold the other half of the pastry over the apples and press the edges to seal.
- Brush the pastry with the beaten egg for a golden glaze.
- Bake for 25 minutes, or until the pastry is golden brown and puffed.
Nutritional Information (Per Serving):
- Calories: 250
- Fat: 12g
- Carbohydrates: 30g
- Sugar: 15g
Chocolate Hazelnut Puff Pastry Twists
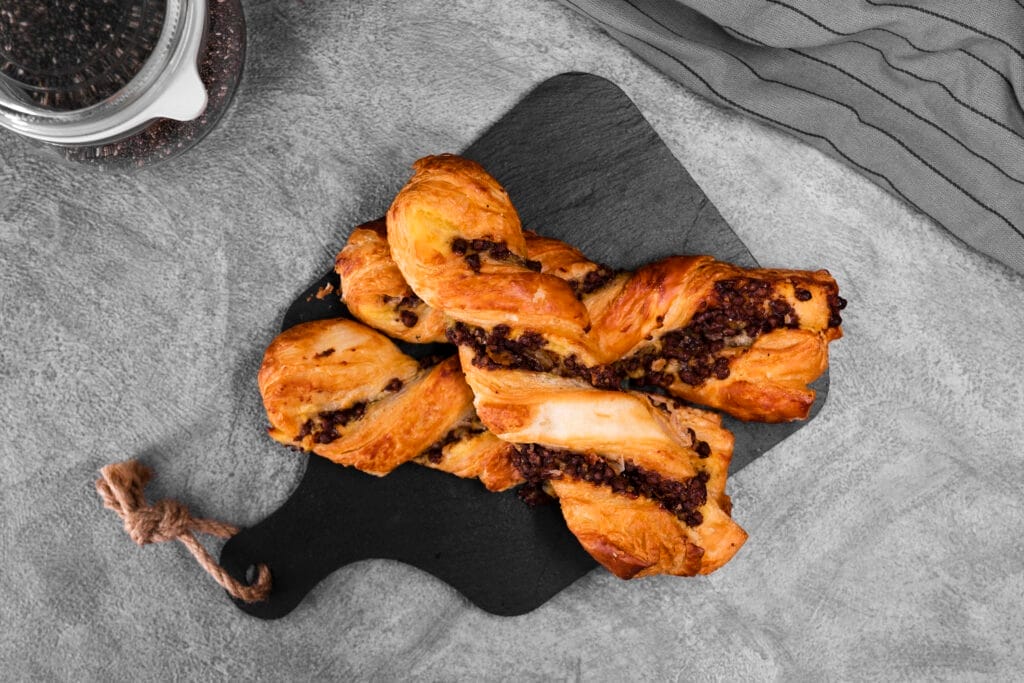
For chocolate lovers, these puff pastry twists are a dream come true. I discovered this puff pastry filling recipe during a rainy weekend experiment, and it’s since become my most requested dessert for gatherings.
Ingredients:
- 1 sheet of puff pastry, thawed
- 1/2 cup chocolate hazelnut spread
- 1/4 cup chopped hazelnuts
- 1 egg, beaten (for egg wash)
Time Required:
- Preparation time: 15 minutes
- Baking time: 20 minutes
- Total time: 35 minutes
Step-by-Step Instructions:
- Preheat your oven to 400°F (200°C). Line a baking sheet with parchment paper.
- Roll out the puff pastry on a floured surface to a thickness of about 1/8 inch.
- Spread the chocolate hazelnut spread over one half of the pastry.
- Sprinkle the chopped hazelnuts over the spread.
- Fold the other side of the pastry over the filling and pinch the edges to seal.
- Slice the pastry into strips and twist each one into a spiral.
- Brush the pastry with the beaten egg for a golden glaze.
- Bake for 20 minutes, or until the pastry turns golden brown.
Nutritional Information (Per Serving):
- Calories: 300
- Fat: 18g
- Carbohydrates: 25g
- Sugar: 10g
Puff Pastry Desserts with Fruit for Every Season
One of the joys of creating puff pastry desserts with fruit is adapting to what’s in season. Fresh, ripe fruit paired with buttery pastry creates desserts that celebrate nature’s sweetest offerings.
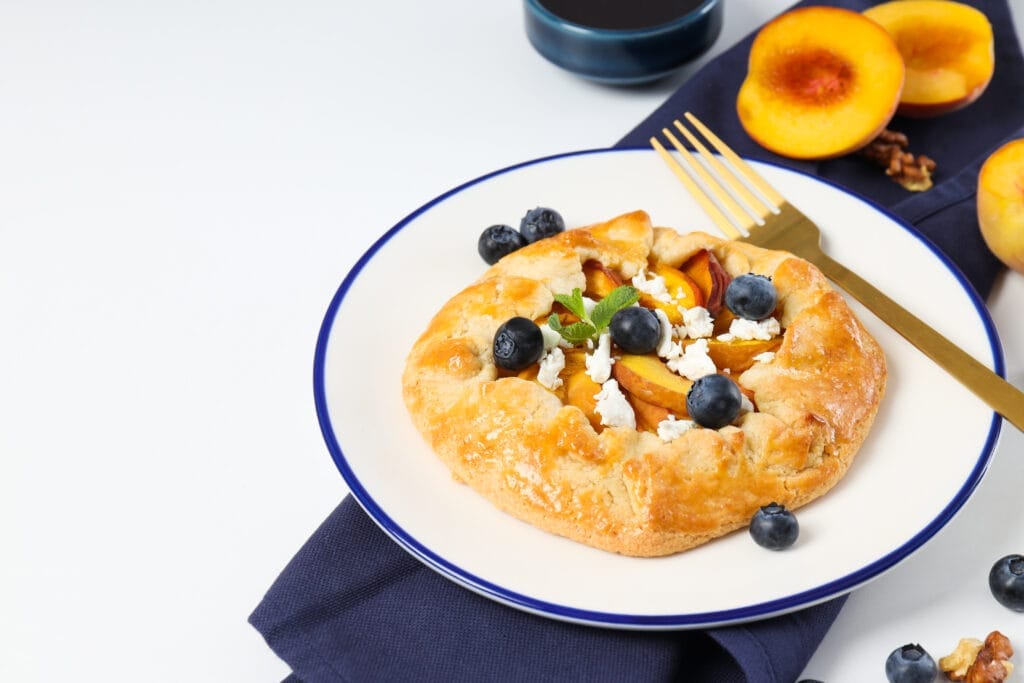
Summer Berry Puff Pastry Tart
This open-faced tart showcases summer’s bounty of berries. The vibrant colors and natural sweetness of fresh berries make this one of my favorite puff pastry uses recipes during warmer months.
Ingredients:
- 1 sheet of puff pastry, thawed
- 2 cups mixed summer berries (strawberries, blueberries, raspberries)
- 1/4 cup granulated sugar
- 1 tablespoon cornstarch
- 1 egg, beaten (for egg wash)
Time Required:
- Preparation time: 20 minutes
- Baking time: 25 minutes
- Total time: 45 minutes
Step-by-Step Instructions:
- Preheat your oven to 400°F (200°C).
- Roll out the puff pastry and lay it on a baking sheet.
- Combine the summer berries with granulated sugar and cornstarch.
- Spread the berry mixture over the center of the pastry, leaving a 1-inch border all around.
- Fold the edges of the pastry up and over slightly to create a rustic edge.
- Brush the exposed pastry with the beaten egg for a golden glaze.
- Bake for 25 minutes or until golden brown.
Nutritional Information (Per Serving):
- Calories: 250
- Fat: 12g
- Carbohydrates: 30g
- Sugar: 15g
These easy puff pastry desserts with fruit are perfect for any occasion—light, flavorful, and visually stunning.
Caramelized Pear and Almond Puff Pastry Galette
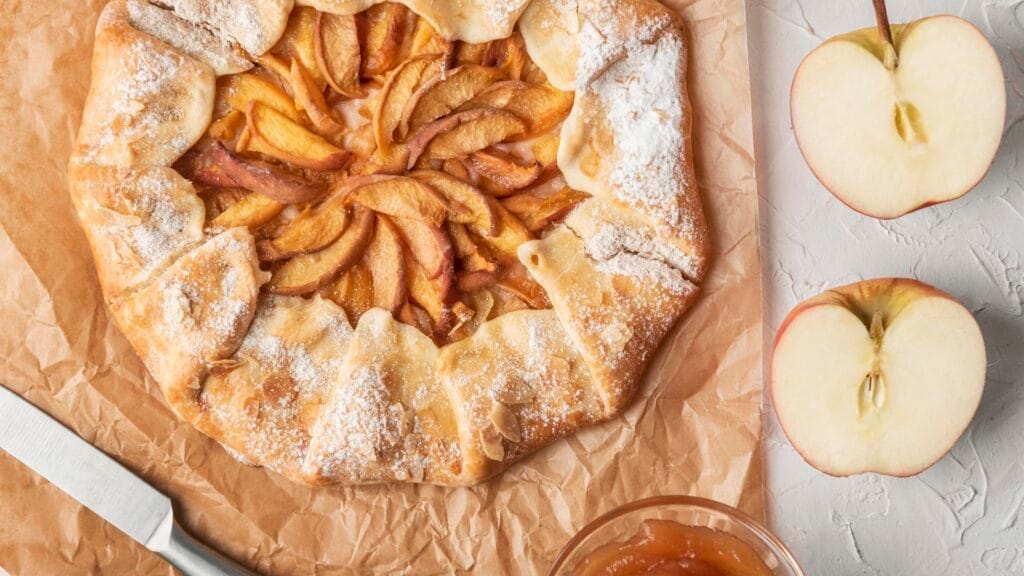
This autumn-inspired galette combines the elegance of caramelized pears with the nutty depth of toasted almonds. I discovered that pears and almonds create magic together when nestled in a flaky puff pastry crust.
Ingredients:
- 1 sheet of puff pastry, thawed
- 2 ripe pears, peeled and sliced
- 1/4 cup granulated sugar
- 1/4 cup sliced almonds
- 2 tablespoons unsalted butter
Time Required:
- Preparation time: 25 minutes
- Baking time: 30 minutes
- Total time: 55 minutes
Step-by-Step Instructions:
- Preheat your oven to 375°F (190°C).
- Roll the puff pastry and set it on a parchment-lined baking sheet.
- In a skillet, cook the pear slices with granulated sugar and unsalted butter until caramelized, about 5-7 minutes.
- Allow the pear mixture to cool slightly, then arrange on the pastry, leaving a 1.5-inch border.
- Sprinkle sliced almonds over the pears.
- Fold the edges of the pastry over to shape a galette.
- Bake for 30 minutes or until golden brown and crisp.
Nutritional Information (Per Serving):
- Calories: 320
- Fat: 18g
- Carbohydrates: 35g
- Sugar: 20g
Quick and Easy Puff Pastry Fillings for Last-Minute Treats
Life gets busy, and sometimes you need a delicious dessert in a pinch. These quick puff pastry filling recipes require minimal ingredients but deliver maximum impact—perfect for unexpected guests or satisfying sudden sweet cravings.
3-Ingredient Cream Cheese Danish
I stumbled upon this simplified version of a cream cheese danish years ago when I needed a last-minute breakfast treat. With just three ingredients, it’s become my secret weapon for impromptu brunches.
Ingredients:
- 1 sheet of puff pastry, thawed
- 8 oz cream cheese, softened
- 1/4 cup granulated sugar
Time Required:
- Preparation time: 10 minutes
- Baking time: 15 minutes
- Total time: 25 minutes
Step-by-Step Instructions:
- Preheat your oven to 400°F (200°C). Line a baking sheet with parchment paper.
- Roll out the puff pastry on a floured surface to a thickness of about 1/8 inch. Slice into squares or rectangles, according to your preference.
- Mix the softened cream cheese with granulated sugar until smooth. Spoon a small amount onto the center of each pastry square, leaving a 1/2 inch border around the edges.
- Fold the opposite corners of each square toward the center, pressing lightly to adhere.
- Bake for 15-20 minutes, or until golden brown and puffed.
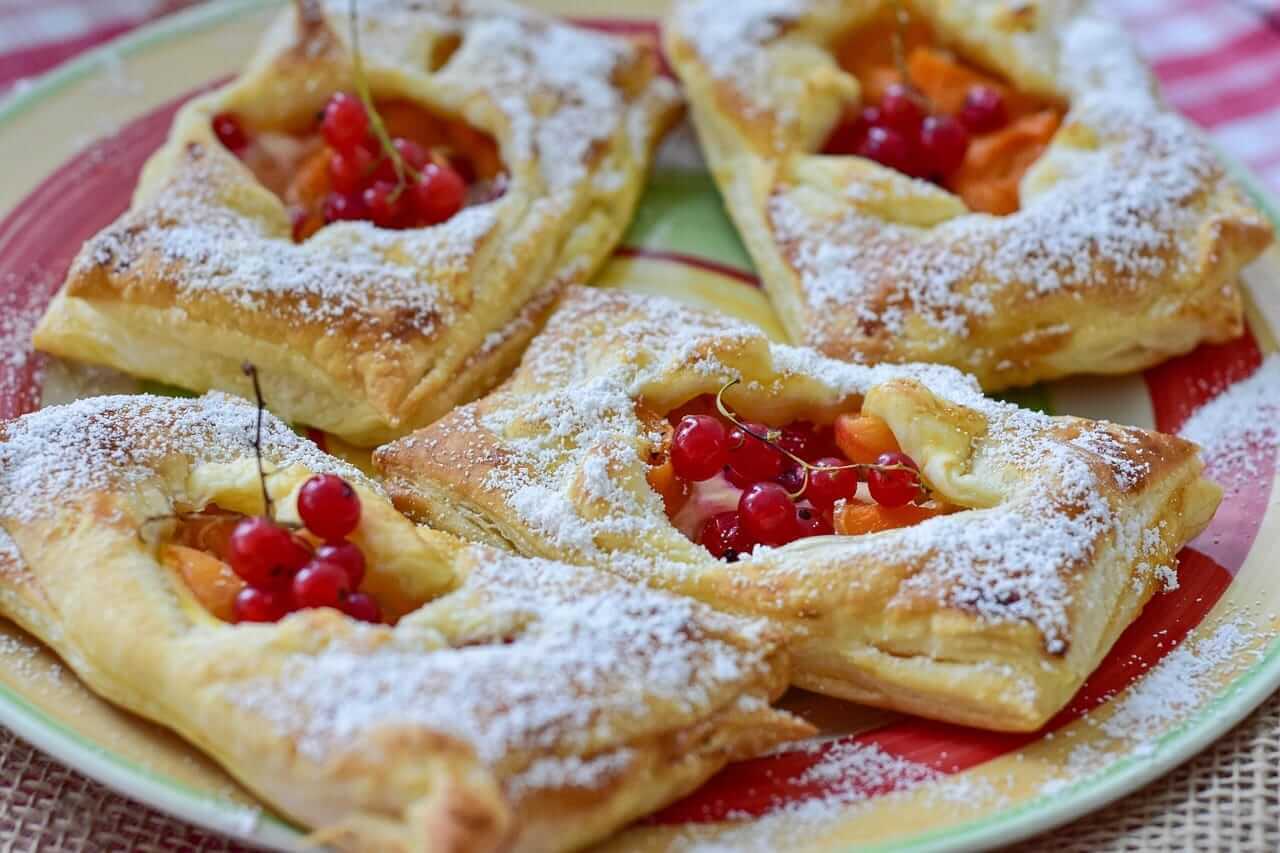
Jam and Nut Puff Pastry Squares
These simple squares showcase how versatile puff pastry filling recipes can be. I love that you can customize them based on whatever jam and nuts you have in your pantry.
Ingredients:
- 1 sheet of puff pastry, thawed
- 1/2 cup jam (any flavor—I’m partial to raspberry or apricot)
- 1/4 cup chopped nuts (walnuts or almonds work well)
Time Required:
- Preparation time: 15 minutes
- Baking time: 20 minutes
- Total time: 35 minutes
Step-by-Step Instructions:
- Preheat your oven to 400°F (200°C). Line a baking sheet with parchment paper.
- Roll out the puff pastry on a floured surface to a thickness of about 1/8 inch. Cut into squares.
- Spread a thin layer of jam on each square, leaving a 1/2-inch border around the edges. Sprinkle chopped nuts over the jam.
- Fold the edges of the pastry squares over the filling to create a border, pressing lightly to seal.
- Bake for 20-25 minutes, or until the pastry turns golden brown.
As my grandmother used to say, “The joy of baking is that it brings people together, and with puff pastry, that joy is multiplied.” These quick and easy puff pastry fillings are perfect for any occasion, allowing you to create impressive desserts with minimal effort.
Expert Tips and Tricks for Perfect Puff Pastry Desserts
After years of experimenting with countless puff pastry ideas, I’ve gathered some invaluable insights that will help you achieve consistently excellent results. These tips will elevate your puff pastry game from good to extraordinary.
Common Mistakes to Avoid
Learning from mistakes is part of becoming a better baker. Here are some pitfalls I’ve encountered and how to avoid them:
- Temperature troubles: Keep your puff pastry thoroughly chilled until the moment you’re ready to use it. If it becomes too warm, the butter will melt prematurely and you’ll lose those beautiful, flaky layers.
- Overworking the dough: Handle puff pastry gently and minimally. Excessive manipulation damages the delicate butter layers that create that magical rise.
- Overfilling: Resist the urge to pile on too much filling—it can make the pastry soggy and prevent proper rising. A little restraint goes a long way!
- Skipping the egg wash: An egg wash gives pastry that professional, golden sheen. Don’t skip this simple step if you want impressive results.
Serving Suggestions
Presentation can elevate a simple puff pastry dessert to a sophisticated finale for any meal:
- Serve warm with a contrasting scoop of ice cream
- Dust artfully with powdered sugar just before serving
- Drizzle with complementary sauces (caramel, chocolate, fruit coulis)
- Add fresh herbs like mint or edible flowers for special occasions
- Pair with the right beverage—coffee, tea, or dessert wine
Storing and Reheating Guidelines
Proper storage ensures your puff pastry creations maintain their quality:
| Storage Method | Duration | Best For |
|---|---|---|
| Airtight container at room temperature | Up to 2 days | Pastries with stable fillings |
| Refrigerated | Up to 5 days | Cream or cheese-filled items |
| Frozen (unbaked) | Up to 1 month | Preparing ahead for events |
To reheat, place in a preheated 350°F (180°C) oven for 5-10 minutes. This restores the crispness far better than microwave reheating, which tends to make pastry soggy.
Make-Ahead Options
Planning ahead with puff pastry desserts has saved many of my dinner parties:
- Assemble pastries completely, freeze unbaked on a baking sheet, then transfer to storage bags
- Prepare fillings up to 3 days in advance and store separately
- Par-bake plain pastry shapes, then add fillings and finish baking just before serving
By following these expert tips and adapting them to your favorite puff pastry filling recipes, you’ll achieve consistently impressive results that will have everyone asking for your secrets!
Conclusion: Elevate Your Dessert Game with Puff Pastry
Now that you’ve explored the wonderful world of puff pastry desserts, it’s time to get creative in your own kitchen. This versatile ingredient opens up endless possibilities for both novice bakers and experienced pastry chefs alike.
Whether you’re crafting a classic apple turnover, experimenting with chocolate hazelnut twists, or creating seasonal fruit tarts, puff pastry provides a foundation for culinary creativity that few other ingredients can match. The techniques and puff pastry filling recipes we’ve discussed will help you impress friends and family with seemingly complex desserts that are actually quite accessible.
I’ve found that the magic of puff pastry lies in its transformation—from a simple sheet of dough into a cloud-like, buttery creation that elevates whatever filling you choose. Don’t be intimidated by its reputation; embrace the versatility of puff pastry and let your imagination guide your next sweet creation.
Remember that practice makes perfect, and each time you work with puff pastry, you’ll discover new puff pastry ideas and techniques to enhance your baking repertoire. Your taste buds—and your grateful guests—will thank you for the delicious journey.
FAQ
What are some creative puff pastry ideas for desserts? You can make fruit-based tarts, chocolate-filled twists, cream cheese danishes, and classic desserts like apple turnovers. The possibilities extend to seasonal galettes, jam-filled squares, and even elegant napoleons for special occasions.
Can I use store-bought puff pastry for desserts, or should I make it from scratch? Both options work wonderfully! Store-bought puff pastry offers convenience and consistency, making it perfect for beginners or busy bakers. Homemade puff pastry provides more control over ingredients and can result in an even more luxurious texture for special occasions.
What are some easy puff pastry fillings I can use for last-minute treats? Simple fillings like cream cheese mixed with sugar, fruit preserves, chocolate spread, or even a mixture of cinnamon and sugar make delicious last-minute puff pastry desserts. The 3-ingredient cream cheese danish and jam squares we covered are perfect examples of quick but impressive treats.
What can I do to keep my puff pastry from getting soggy? To prevent sogginess, avoid overfilling your pastry, consider blind baking the base for a few minutes before adding wet fillings, and use thickeners like cornstarch in fruit fillings. An egg wash creates a protective barrier that helps maintain crispness.
Can I make puff pastry desserts ahead of time? Absolutely! Many puff pastry desserts can be assembled and frozen unbaked, then baked directly from frozen when needed. Alternatively, you can prepare components separately and assemble just before baking. Some fully baked items can be stored and briefly reheated to restore crispness.
What are some puff pastry uses for sweet recipes beyond traditional desserts? Beyond standard desserts, puff pastry works beautifully in breakfast items like morning buns, as edible cups for mousse or fruit salad, formed into churro-like sticks with cinnamon sugar, or even as a decorative topping for puddings and ice cream.
How do I store and reheat puff pastry desserts? Store cooled pastries in an airtight container at room temperature for up to 2 days or refrigerated for up to 5 days. For best results when reheating, place them in a preheated oven at 350°F (180°C) for 5-10 minutes to restore crispness rather than using a microwave.